Connect your own Amazon SES account
Launch one setup stack in AWS from Settings → AWS and EmailFig sets up Amazon SES in your AWS account. No keys to copy or paste.
Connecting your AWS account takes one click in EmailFig and one in AWS. From Settings → AWS you launch a CloudFormation stack (a ready-made setup that AWS runs for you), and EmailFig does the rest. You never type an AWS account number or an access key.
Before you start
- Sign in to the AWS console as the AWS account you want to send from. Whichever account you’re signed in to is the one that gets connected.
- You need permission to create an IAM role (the permission that lets EmailFig send through your account). If someone else looks after your AWS account, send them this page first, especially What EmailFig can access.
- Your own Amazon SES works in the us-east-1 region. The link selects it for you.
Connect
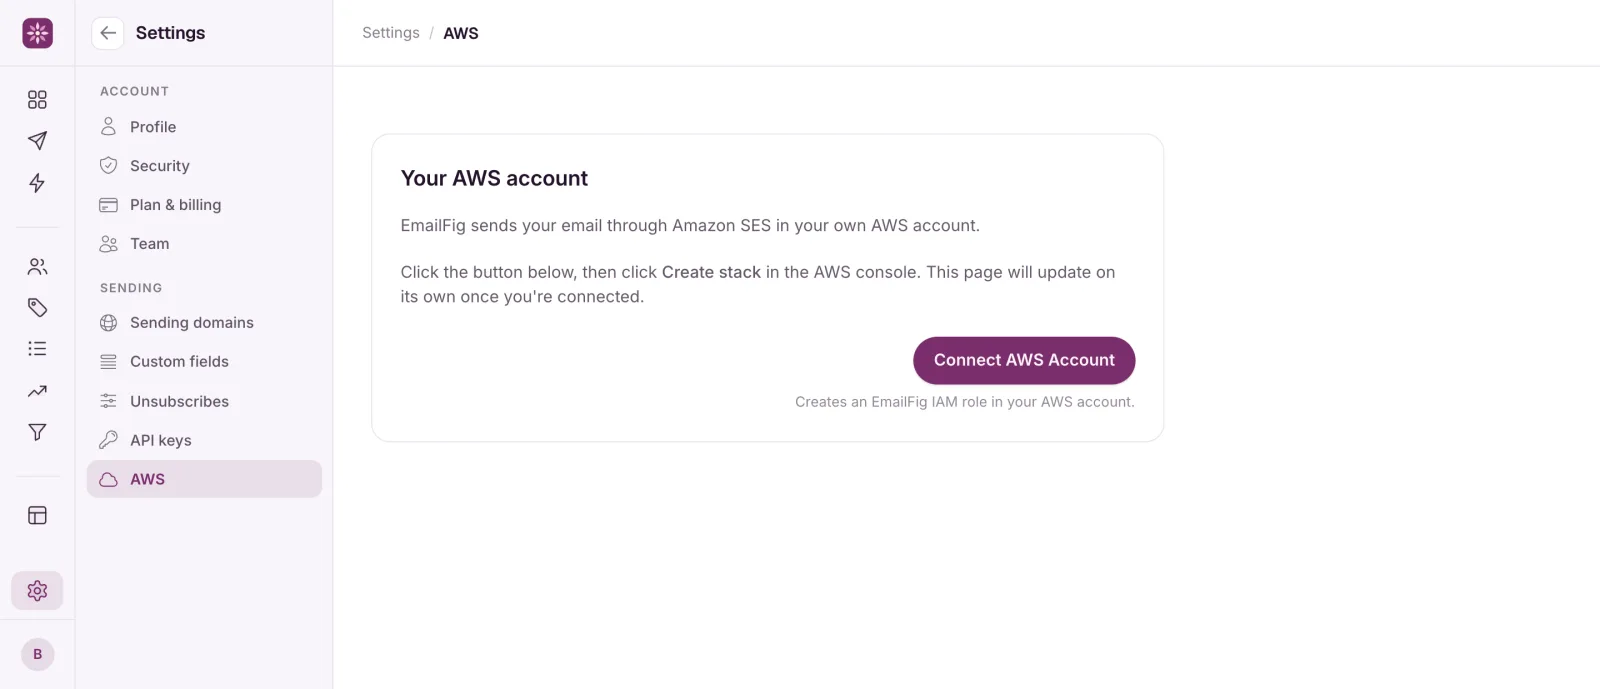
- Go to Settings → AWS. The card is called Your AWS account.
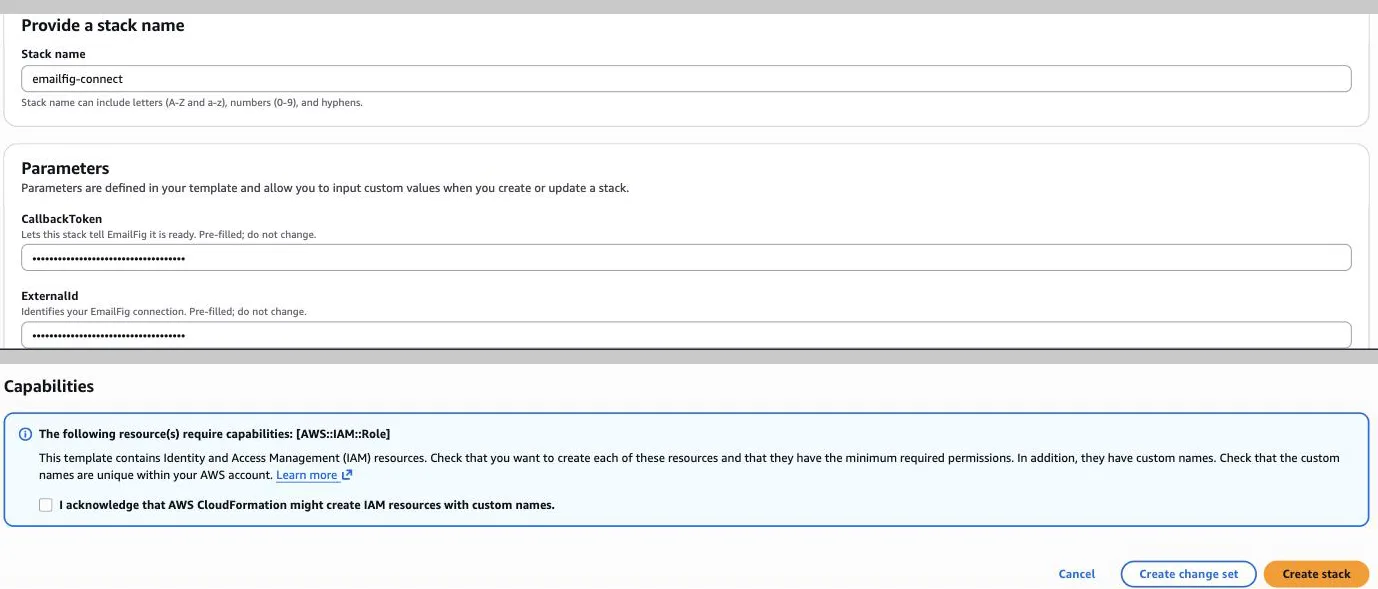
- Click Connect AWS Account. The AWS CloudFormation console opens in a new tab with everything filled in.
- Leave the stack name and both parameters as they are. If you change them, EmailFig can’t use what gets built.
- Tick the box acknowledging that the stack creates IAM resources, then click Create stack.
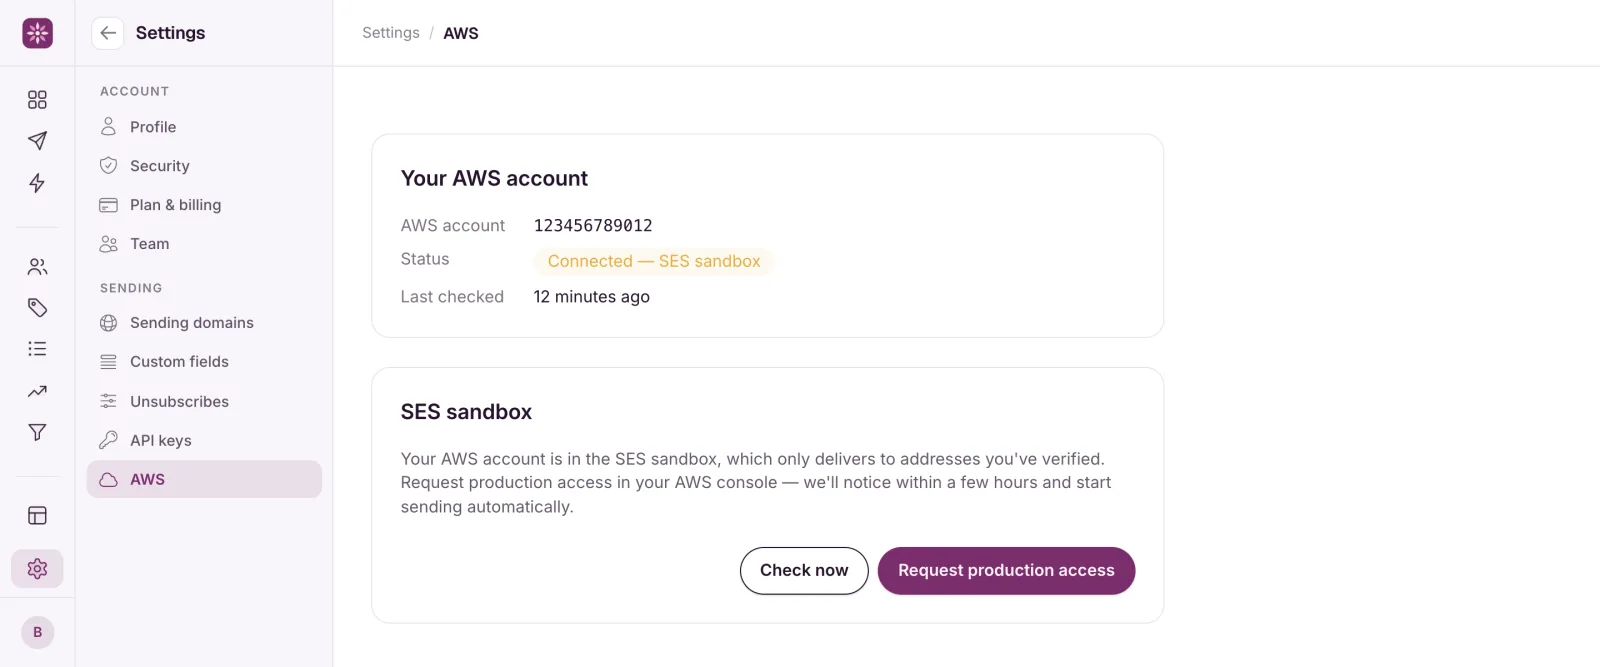
- Go back to the EmailFig tab. It updates on its own: Waiting for your stack, then Setting up, then Connected (SES sandbox) or Connected.
Setting up usually takes about a minute. When it’s done we email you, with the subject Your AWS account is connected.
What to do next
- Add and verify a sending domain. You can do this while you’re in the SES sandbox. See Add and verify a sending domain.
- Request production access from Amazon. A new SES account starts in the sandbox, a trial mode that only delivers to addresses you’ve verified. See Leave the SES sandbox.
What EmailFig can access
The stack creates one IAM role in your AWS account, EmailfigConnectRole, and nothing else. EmailFig uses it to send your email through Amazon SES, set up your sending domains, and receive your bounces, complaints, opens and clicks. It can’t read or change anything else in your account, and it only works in us-east-1. Once the stack is created, you can see the role’s exact permissions in the IAM console.
Keep the emailfig-connect stack. Deleting it removes the role and EmailFig’s access, and your campaigns and automations stop until it’s back.
If something goes wrong
- The card shows a message instead of connecting. Each message names the problem and offers the button that fixes it. They’re all listed in AWS connection health errors.
- The stack failed or rolled back in CloudFormation. Delete the failed stack in the AWS console, then click Connect AWS Account again.
- The stack finished, but EmailFig still shows Connect AWS Account a few minutes later. Email contact@emailfig.com from the address you sign in with, and include the stack ID from CloudFormation.