Create a landing page
Build a signup page that EmailFig hosts for you, with its own link to share. No website needed.
A landing page is a complete signup page that EmailFig hosts at its own link, so you can share it anywhere without a website of your own. You pick a layout, edit the page directly, then publish it.
Create the page
- Go to Grow and click Create new.
- Choose Landing page.
- Click the layout you like. You can add, remove and reorder its sections later.
EmailFig saves the page as a draft and opens the designer.
Design it
The designer shows your page on the left and a panel on the right. To change the words, click them on the page and type. That works for any heading, paragraph, button or the consent line.
The panel changes with what you click:
- Page is what you see first: the page’s sections in order. Drag a row to move it, and click + Add section to add one. The ▣ marks the section with the signup form; every page has exactly one.
- Click a section to change its items, image and Options, or to Duplicate, Hide or Remove it. Hide keeps the section so you can bring it back; Remove deletes it. ← Page takes you back.
- Click the signup form to change its Fields, Colours and Shape. Apply, next to Match the page, gives the form the page’s colours.
Page styles, below the list of sections, styles the whole page at once: Ground (Light, Cream or Dark), Accent, and the Headings and Body fonts.
The bar above the page switches between Desktop and Mobile, and between the Landing page and the Thank-you page people see after they sign up. Click the thank-you heading or message to edit it. A new page starts with “Thanks for signing up” and “If we’ve asked you to confirm, check your inbox.”
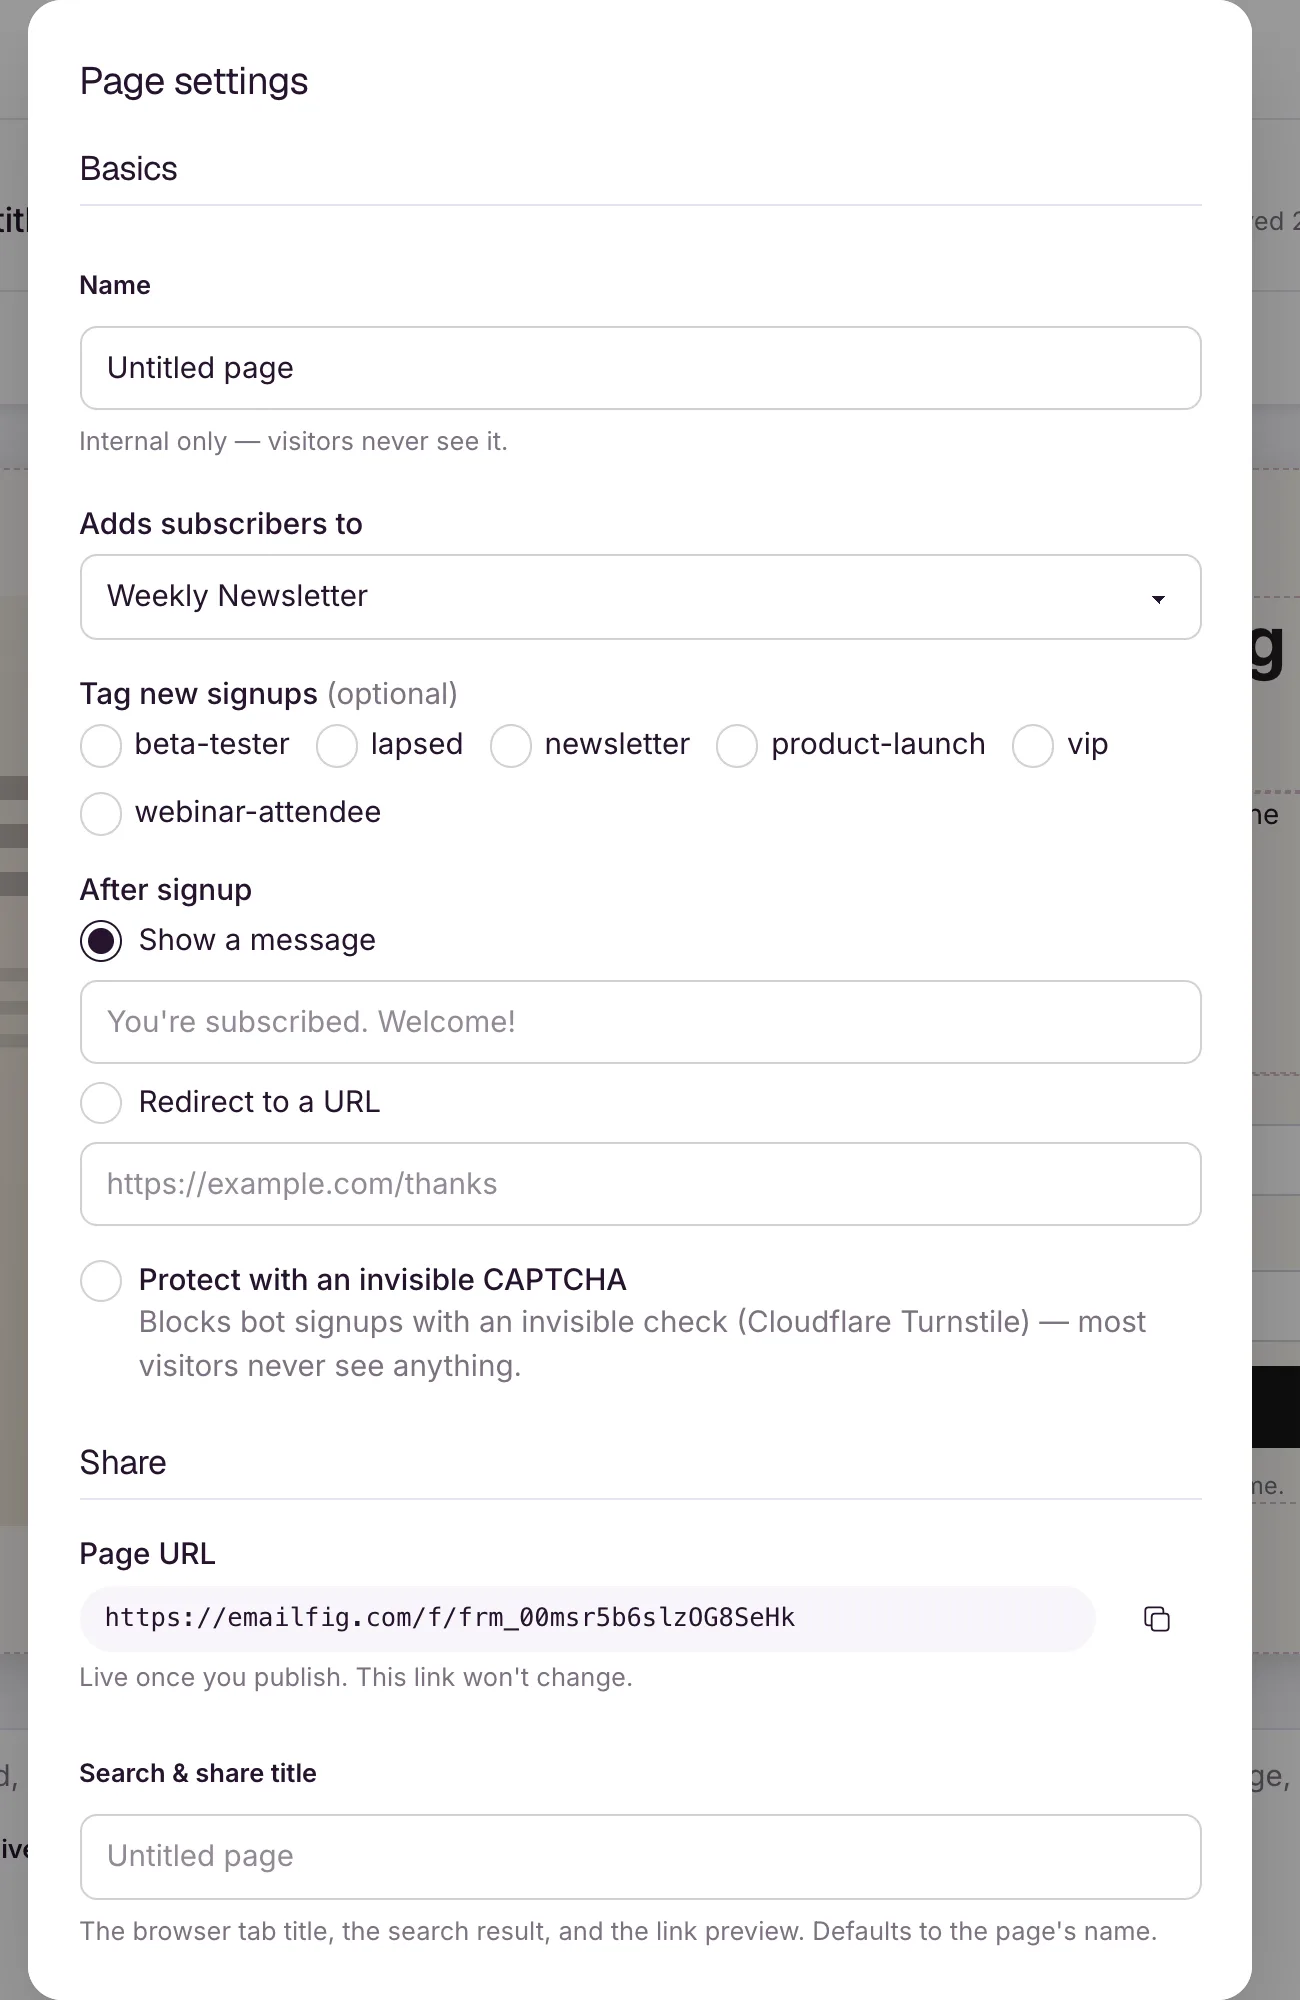
Page settings
Click Page settings in the top bar for the settings visitors don’t see:
- Name: only you see it.
- Signups: Adds subscribers to (the list) and Tag new signups.
- After signup: Show thank-you page or Go to a URL. See Set what happens after signup.
- Protection: Protect with an invisible CAPTCHA. See Block bots with Turnstile.
- Sharing: the Page URL (it never changes), plus a Search & share title, Description and Social preview image for search results and link previews.
- Branding: Show “Powered by EmailFig” in the page footer. You can turn it off on a paid plan.
Publish
Click Save to keep your work (design and settings) as a draft, or Publish to save and put the page live. Preview opens the page in a new tab at any time.
Until you publish, the link shows “This form isn’t available”, and Grow shows “Publish to get a link”. Once it’s live, copy the link from Grow or Page settings. Unpublish takes the page back to draft and the link stops working. You keep every signup it collected.
If the editor says the page “can’t be published yet”, see Why won’t my form go live?