Add and verify a sending domain
Add your domain, copy a few records to your domain provider, and EmailFig verifies it for you.

Your campaigns send from your own domain once it’s verified. You add the domain in EmailFig, copy a few records to the company that manages your domain, and EmailFig checks them for you. These records (called DNS records) prove the domain is yours, so inboxes trust your email.
- Go to Settings → Sending domains and click Add domain.
- Enter your domain, like
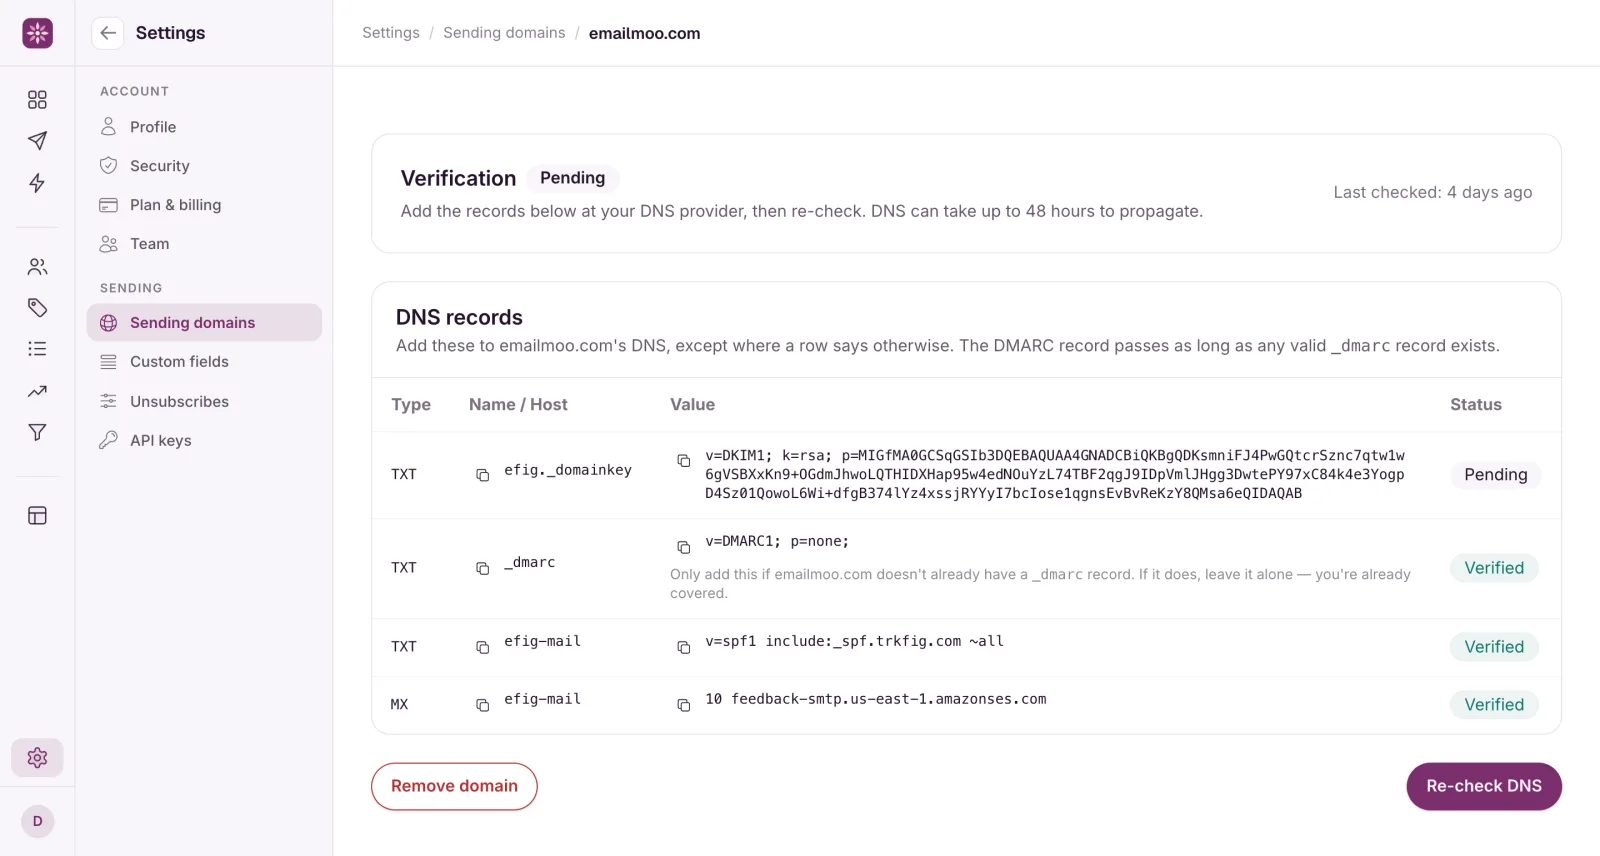
yourcompany.com, and click Add domain again. - You’ll see “Generating your DNS records…” for a moment, then a DNS records table. Use the copy buttons to copy each row into your domain provider exactly as shown.
- Come back and click Re-check DNS, or carry on with something else. EmailFig keeps checking on its own, and the status changes to Verified once every record is live.
Changes often show up within minutes, but can take up to 48 hours. EmailFig emails the account owner when the domain is ready to send.
If you entered a Send from address in the Get started guide, its domain is already added. Open it from Settings → Sending domains to see its records.
For help with the records, see Publish DNS records at your domain provider. Publish DNS records at your domain provider explains what each one does.
Which domain to use
Use the domain your business is known by, like yourcompany.com. It’s what people see in your from address. A subdomain such as news.yourcompany.com works too if you’d rather keep marketing mail separate.
You need to be able to change the domain’s settings at your domain provider. You don’t need a mailbox on it.
Set your sending defaults
Below your domains on Settings → Sending domains, the Sending defaults card has a Default from name and Default from email. They’re filled in on every new campaign, and you can change them per campaign. Use an address on a verified domain, such as hello@yourcompany.com, then click Save defaults.
Double opt-in confirmation emails also come from the Default from email. See Double opt-in.
If adding the domain doesn’t work
The form tells you what’s wrong under the Domain field:
- is a free email provider. Use a domain you own. Addresses like Gmail or Outlook can’t be sending domains.
- is not a valid domain. Enter only the domain, like
yourcompany.com, without@or spaces. - is reserved and can’t be added. That domain belongs to EmailFig.
- is already registered. Another EmailFig account (possibly another of yours) has already added it. See Why does my domain say it’s already registered?
- You’ve reached the limit of 25 sending domains. Remove one you’re not using, or email contact@emailfig.com.
If the page says Setup failed or “We couldn’t generate DNS records for this domain”, click Remove domain and add it again. If that keeps happening, email contact@emailfig.com with the domain name and a real person will help.
If you use your own Amazon SES
Connect your AWS account first. Until it’s connected, the Add domain button reads Set up AWS first and takes you to Settings → AWS. See Connect your own Amazon SES account.